

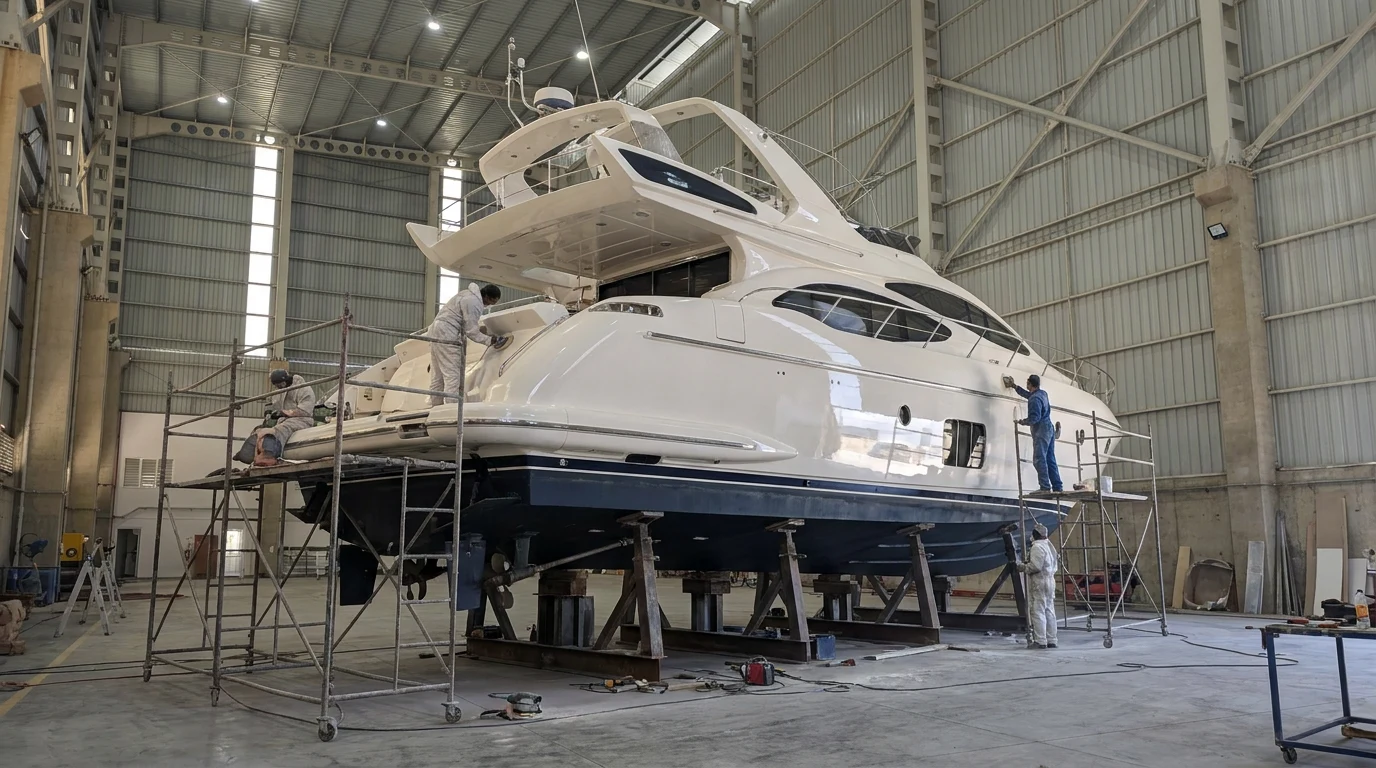
The above-water topsides are the surface seen first, and it's here that judgement is formed about whether a boat is well maintained. But topside paint isn't just about appearance: the surface is the outermost layer of a system that protects the hull from UV, salt and mechanical wear. That's why the decision to paint starts not with choosing a tin, but with assessing the condition of the existing surface. A painting decision made at the wrong time means both unnecessary expense and a road that's hard to reverse; a topside paint job done at the right time with the right system, on the other hand, carries the boat's appearance for years. This article explains, in order, how the decision is made and how the work proceeds at the yard.
First, the decision: paint or polish?
On fibreglass boats, the topsides are usually covered with gelcoat. Gelcoat is a coloured, durable resin layer applied inside the mould, and a new boat doesn't need paint. Over time, UV light degrades the resin on the gelcoat's surface; it turns matte, chalky and faded in colour. However degraded this layer is, if sound gelcoat still remains underneath, the job isn't painting but removing the dead layer with an abrasive polish and sealing the surface for protection. We've covered this process and its limits in detail in our gelcoat repair article.
The criteria to weigh in this decision are as follows. First, gelcoat thickness: how many times the hull has been sanded and polished over its lifetime thins the gelcoat, and a test polish on a small patch in a shaded area shows how much of the underlying layer is left. Second, the type of damage: localised scratches, impact marks and small cracks can be repaired and polished; widespread spider cracking along the hull, numerous old repair patches and colour mismatches point towards painting. Third, colour: dark gelcoats fade faster and end up looking patchy, and if the colour is being changed anyway, painting is required regardless. Fourth, expectations: polishing gives a season or two of gloss and has to be repeated, whereas a well-applied two-component paint lasts far longer.
It is worth keeping this distinction clear: painting is not a step you can reverse. Once a hull has been painted, you can no longer manage it with gelcoat polishing again; from that point on, your maintenance regime is the paint's regime. This is why the rule "polish if the gelcoat still has depth left, paint if it doesn't" is the soundest rule in practice.
Surface preparation: the real eighty percent of the job
What determines the quality of a hull paint job is not the brand of paint but the surface beneath it. On a job where preparation has been cut short, even the most expensive paint will blister or peel within a season.
The sequence works as follows. First, the surface is cleaned with a degreaser that dissolves silicone and wax residue. On a hull that has been polished for years, wax forms an invisible barrier that stops the paint from adhering; skipping this step causes the paint to come out pitted with craters known as fish eyes. Cleaning is carried out over a wider area than the surface to be painted, and cloths are changed frequently; wiping with the same dirty cloth only spreads the contamination further.
Mechanical preparation follows. If old paint is present, its condition is assessed: a sound, compatible existing layer can be sanded and painted over, while a blistered, peeling or unidentified layer is stripped back entirely. If working over gelcoat, the surface is sanded to create a profile the paint can key into. The system's specification is decisive here, as every manufacturer states a grit for its own primer.
Repairs are carried out at this stage. Impact marks, holes and deep scratches are filled with epoxy filler, left to cure and levelled with a long sanding block. The block is a critical tool: a surface sanded by hand comes out wavy, and on a broad surface like a hull that reflects light horizontally, every wave shows from a distance. The flatness of the surface is the single most decisive factor in how the finished job looks.
The waterline, deck edge, boarding ladder/swim platform area and hardware fittings are masked off. Where possible, rail stanchions, door handles, name lettering and rubbing strips are removed, as a taped-off fitting always leaves a line at its edge. This stage may look simple enough to rush through, but it directly determines the outcome of the whole job.
Layer logic: primer, filler and topcoat
A modern hull paint isn't a single product but a system of layers engineered to work together. Each layer has a distinct job, and layers aren't mixed and matched; putting one manufacturer's topcoat over another manufacturer's primer means taking on the risk of an incompatibility problem.
Primer: Bonds to the underlying surface and gives the layer above it a surface to key into. Epoxy primers also act as a moisture barrier and form a separating layer between the filler and the topcoat. The primer also closes off small pores in the surface.
Fairing compound and high-build primer: This is the layer that establishes the flatness of the surface. Epoxy fairing compound fills deep irregularities, while high-build primer covers sanding marks and fine undulations. A thin guide coat is usually sprayed over this layer; as sanding progresses, the dark marks that remain show which points of the surface are still low. This simple method is the most reliable way to achieve a fair hull.
Topcoat: Carries the colour, gloss and UV resistance. It's usually applied in two or three thin coats; a single thick coat results in sagging and an orange-peel finish. The overcoat window between coats is the interval given by the manufacturer and varies with temperature; if this window is missed, intermediate sanding is needed for adhesion between coats.
One practical rule is enough for system integrity: the primer, filler, thinners and topcoat should all belong to the same manufacturer's same system, and the mixing ratios and waiting times in the technical data sheet should be followed to the letter. If you're planning this kind of work as part of a refit, the choice of paint system is made at the start of the job; it isn't changed halfway through.
The difference between single-component and two-component polyurethane
This is the fundamental distinction in hull paints, and the choice shapes both the result and how the job gets done.
Single-component paints are used straight from the tin, curing through exposure to air and solvent evaporation. Application is forgiving: they work well with a roller and brush, can be corrected, and any mistakes can be sanded down and redone. Local repair is easy; a single area can be refreshed after a few years. On the other hand, their gloss and UV resistance fall short of two-component paints; the general expectation is that they keep their freshness for a few seasons and need regular renewal. They're a sensible choice for boat owners doing their own work.
Two-component polyurethanes cure chemically when the paint and hardener are mixed in a specific ratio. The result is a far harder, far glossier surface with markedly better UV resistance; correctly applied, its lifespan is measured in years. Both the price and the difficulty of application are high. Once mixed, it has a limited pot life; once that time is up, the remaining material can't be used. Local repair is difficult, because it's hard to match a new coat to the old one in colour and gloss; usually an entire panel is redone up to a natural cut line.
In two-component systems, workplace safety is a subject in its own right. The isocyanate-containing aerosol produced especially during spray application isn't something a simple dust mask can protect against; it requires supplied-air breathing equipment, a full coverall and a ventilated work area. This is one of the main reasons why application is mostly carried out in the boatyard, in an enclosed, filtered environment.
Roughly speaking, the choice comes down to this: single-component if you'll paint the boat yourself and have a usage pattern that allows frequent touch-ups; two-component if you want long life, high gloss and a factory finish, and will hand the job to a professional crew.
Application: spray versus roller-and-brush
The same paint gives a different result depending on the application method. Both methods can produce the right result; the difference lies in the infrastructure required and the tolerances accepted.
Spraying gives the smoothest surface. The paint is atomised and reaches the surface as a very fine, even film; with a correctly set-up gun, orange peel almost disappears. But it comes at a cost: an enclosed, dust-free environment, a good compressor and filter line, adequate ventilation, extensive masking and full protective equipment. Spraying also spreads error evenly; if gun distance, speed and overlap rate aren't kept constant, it leaves marks. In a crowded boatyard, spray work requires a separate area and a tent to keep overspray from drifting onto neighbouring boats.
The roll and tip method is the most common practical solution used on boats. Two people work together: one applies a thin coat with a short-nap, paint-resistant roller, and immediately behind them a second person lightly strokes a dry, soft-tipped brush over the surface in one direction, breaking roller bubbles and smoothing out marks. The trick is never losing the paint's wet edge; for this reason the hull is divided into sections that can be finished in one go, stopping at natural break lines (rubbing strake, name lettering, hull-side moulding line). Working in thin coats always gives a better result than one thick coat.
With either method, using the correct thinner is decisive. The thinner is chosen according to the paint brand and the day's temperature; on a hot day, a slower-evaporating thinner gives the paint time to level out. Using a general-purpose thinner disrupts the system's chemistry.
Air, humidity and dew point
Hull painting is one of those rare jobs where weather conditions directly determine the result. Most of the season in the Aegean is suitable, but even within a single day the window is narrow.
For two-component systems, the generally accepted working range is roughly 10 to 25 degrees Celsius. Below the lower limit, curing slows down and can stop altogether; above the upper limit, the solvent flashes off before the brush passes, the paint can't level out, and the surface comes out matte and grainy. Relative humidity is generally required to stay below sixty to seventy per cent; high humidity reduces gloss and, in some systems, causes surface haze.
The most critical rule is the dew point. Surface temperature must be at least three degrees Celsius above the ambient dew point. If this margin isn't maintained, an invisible film of moisture forms on the surface and the paint settles onto that film; the result is loss of adhesion and dull patches. In the early morning the hull still carries the cold of the night; even if the air has warmed up, the surface can still be below the dew point. Likewise, a hull that starts cooling in the late afternoon draws in moisture while the final coat is still fresh. In practice, the right window sits between late morning and early afternoon.
Wind and dust also come into the equation. In the Aegean, the breeze that picks up in the afternoon carries dust and salt onto the surface during outdoor application. If you're working in the open, finish early; if you're working indoors, keep ventilation filtered. If rain is likely, the final coat isn't applied — a raindrop falling on a surface that hasn't finished curing leaves a permanent mark.
All these conditions must hold at the same time. That's why topside painting is a job whose schedule flexes around the weather forecast, and shipyard planning leaves room for that.
Curing, maintenance and lifespan
Paint keeps curing even after it's touch-dry. This period varies from product to product; the general rule is not to put mechanical load on the surface, and not to tape, polish or clean it harshly until it reaches full hardness. The boat can be relaunched during this period, but care should be taken with fender and pontoon contact on the topsides in the first few weeks.
The maintenance regime is simple, and it's really this that determines the boat's appearance. Wash the topsides regularly with fresh water and a pH-neutral, non-abrasive marine shampoo; salt residue draws moisture and dulls the surface over time. Avoid abrasive sponges and general-purpose household detergents. On two-component surfaces, a suitable wax or polymer sealant takes on part of the UV load. On single-component surfaces, maintenance needs to be more frequent and renewal comes sooner.
Fenders are the topsides' biggest enemy. A grimy fender cover works like sandpaper on the surface; covers should be washed regularly and worn ones replaced. The same goes for temporary protection used when coming alongside a pontoon. The area just above the waterline and the transom need separate attention because of exhaust staining and the weed line; the longer these marks build up, the more abrasive the cleaning needed to remove them, so early attention means less abrasion.
A realistic expectation on lifespan is this: single-component systems call for renewal every few seasons; a two-component polyurethane applied under the right conditions on a well-prepared surface can last many years on a boat that's washed and cared for regularly. In both cases, what determines lifespan has less to do with the paint itself than with the preparation beneath it and the maintenance above it.
Topside painting is both more economical and less disruptive when scheduled within the same haul-out window as underwater work; the underwater hull, antifouling and hull moisture checks are carried out during the same period, so the boat only needs to come out of the water once. If there is any suspicion of blistering on the hull, an osmosis assessment should be carried out before painting; covering it up only hides the problem. At our facility in Ören, we carry out topside preparation, filling and paint application as part of the haul-out plan; if you are not sure whether your boat's topside needs polishing or painting, you can take a look at our services or contact us for an on-site assessment.

 Bodrum Beton
 Bodrum Boru
 İTS Maden
 İTS Gıda